 |
|
|
|

Detailed
instructions for making the
Butterfly Bean Bag version II
|
 |
The
Butterfly Bean Bag
version II |
This
is essentially a simple project, however, explaining how
to go about it is a bit more complex than the actual project.
In truth, the writing of this set of instructions took
far longer than it took to cut and sew the bean bag. Mostly
the hard part is explaining how to sew the back-to-back
technique. This back-to-back design is based on a design
from an article
by Scott Fairbairn. The instructions in that article
were very skimpy, leaving much to the imagination as to
how to put it together. It took some head scratching to
figure out how to do it the first time I tried it. Without
a good sense of three-dimensional space, it can almost
seem like a magic trick when you see it done. However,
I will attempt to take the mystery out of it and make
it seem nearly as simple as it actually is.
 |
Optional
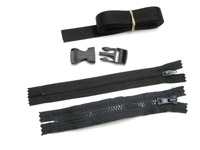
materials - buckle,
nylon web strap and zippers |
For
this project you will need a sturdy fabric of your choice.
One yard of fabric 58-60 inches wide is more than enough.
I am using leftovers from my
kayak cover project, a light green 500 denier
coated Cordura fabric. It is sturdy, waterproof, and has
a good body to it without being stiff, and resists fraying
on the edges, which makes it easy to work with. It's the
same sort of fabric used to make backpacks and camera
bags. If you're like me and can't find a suitable fabric
locally, you can order some from Rockywoods.com
as I did. You will also need two zippers, 6 or 7 inches
long, but they are optional. You could choose to leave
a seam opening to fill the bean bags and stitch up the
opening later. Also optional is a 3/4-inch adjustable
snap buckle and 32 inches of 3/4-inch nylon web strapping.
While
this page of instructions is long and detailed, and the
pattern may look complicated, this is in fact a simple
project. It is essentially 4 pieces of material sewn
back to back to make two little "pillows". That's really
all there is to it. But because they are joined to make
a double set of "pillows", the "how to" part of it is
hard to envision, and may seem almost like magic. Do not
fear, for I will walk you through this in baby steps,
with lots of photos and explanation to make it as clear
and easy as possible at each step. If you can sew two
pieces of fabric together to make a pillow, you can do
this project.
Important Note: Thanks to a suggestion from one
of my readers, I have exported this web page of instructions
to a printable .PDF file. This makes it easy to view and
follow on a tablet or laptop handy to your work/sewing
area without need for an internet connection. Or you can
simply print it out. Click
here to download the PDF.
Step #1- Print and assemble
the pattern so you can transfer it to the fabric.
For
this you will need the .jpg pattern files and a printer.
The pattern is in two resolutions. Use this file
at 72 dpi to view on your monitor for reference.
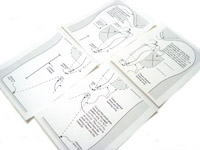
The pattern at 150 dpi for printing on your printer comes
in four sections because the pattern is slightly larger
than 11x17. It has to be printed on four pieces of 8-1/2
x 11 paper, then trimmed, overlapped to match up each
section and taped together to make the full-sized pattern.
Do not print the 72 dpi file meant for viewing. It will
NOT print to actual size, and you will end up with a rather
tiny and useless bean bag.
 |
Pattern
reference
image - click for
larger view |
 |
 |
 |
Four
pattern sections, each
on an 8-1/2x11 sheet |
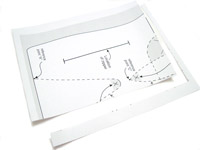
Trim
the white edge of each sheet that will overlap adjacent
sections |
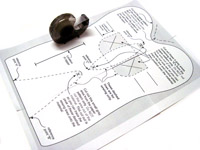
Align
the four sections and tape
together to make full-sized pattern |
Pattern
section one
Pattern
section two
Pattern
section three
Pattern
section four
Begin
by saving each of the four files above to your computer
and print
each on an 8-1/2 x 11 sheet. Alternately, you
could print them right from your browser. Just be sure
your print settings do not resize the image (do not use
"stretch to fit" or "shrink to fit"
settings). Each of these four section printouts will have
two edges that overlap the adjacent sections when assembled.
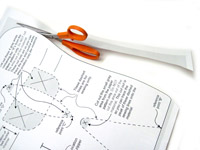
Trim
the excess white area from the two edges that
will overlap the adjacent sections. This will make it
easier to align the printed information with the adjoining
sheet. Once trimmed, assemble
the four printouts and tape them together into
one large pattern. The outer gray edges of the pattern
should measure approximately 11-1/2 x 16-1/4 inches if
they were printed correctly. If this is not the case when
you've assembled them, then the software program you are
printing from is resizing them somehow and the pattern
will not be the correct size. This is not to say you can't
alter the size to suit your needs, but generally this
would be as large as you should need.
 |
 |
 |
Trim
off the gray edge
around the pattern |
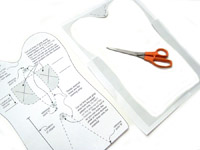
Trimmed
pattern |
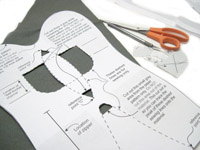
Gray
"X" areas are cut out |
As
noted, the assembled pattern has some instructions printed
right on it with arrows pointing to dashed lines, shaded
areas with "Xs", etc., which explains what the
lines and markings mean. Pay attention to those instructions.
This pattern
reference image shows how the assembled pattern
should appear.
Be
aware that THIS PATTERN SERVES DOUBLE DUTY. You will use
it to cut four pieces of fabric. However, some pattern
markings apply to only two of these fabric pieces, and
some markings apply to the other two fabric pieces. As
you continue, pay attention to which markings apply
to which set of cut fabric pieces.
Step #2- Trim outer edge
and cut out the gray shaded areas marked with "Xs",
following the directions printed on the pattern.
Cut
out the paper pattern on the outer solid outline, which
will remove
the outer gray shaded edges.
Cut
out the gray areas with the "X's" using an Exacto
knife, single-edged razor blade, or scissors. DO NOT cut
these holes in the fabric, only cut them on the paper
pattern. They are there to help you transfer the pattern
to the fabric.
Step #3- Transfer the
pattern to the fabric and cut fabric pieces.
 |
 |
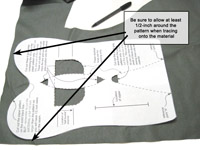
Allow
1/2-inch extra when
laying out pattern |
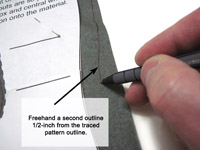
Freehand
draw a second
outline 1/2-inch out for cutting |
 |
 |
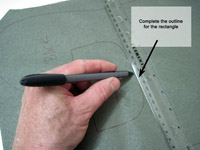
Complete
the missing segments
of the rectangle outline |
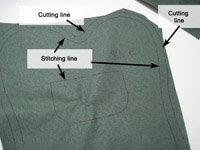
Do
not confuse which lines are for stitching, and which
are for cutting |
Assuming
your fabric has a printed pattern (such as camo), one
side of the fabric will have the full color design, and
the other side will either be blank or will show only
a faded bleed-through of the design. In this case the
material has a distinct front and back side. If it is
a solid color fabric like I'm using for this project,
you will need to determine or assign one side to be the
"back", and then actually write "back"
on it with a pen or marker so you can keep it straight
(which is what I have done). You will need to be careful
and diligent about which side (front or back) you are
working on.
(a)
In this step you first will cut four identical
rectangular pieces of fabric about two inches larger
than the length and width of the paper pattern, which
should give you four rectangles about 13x18 inches each.
This extra room will allow plenty of excess for the seams.
(b)
Choose one of these pieces, lay it out with the BACK SIDE
UP, and center the paper pattern on it. Pin the pattern
to the fabric with 4 or 6 pins so it won't shift, being
sure to leave
at least 1/2-inch extra around the pattern edge.
You need this extra 1/2-inch to ensure your stitches don't
come too close to the edge, pull loose and leak your beans.
Now, with a ball point pen or suitable marking pencil,
trace around the outer edge of the pattern. This outline
you're tracing will be the line you later sew directly
onto.
(c)
Next, draw
freehanded another outline around the pattern
spaced about a half inch outside the paper pattern edge.
This doesn't have to be perfect since it will be inside
the finished bean bag and will not be seen, but this second
outline will be the one you actually cut the fabric on.
(d)
There is one more tracing operation to do before any cutting
can be done. Remember the two larger gray areas with "Xs"
you cut out of the paper pattern? Now you are ready to
take advantage of that. With the pattern still pinned
in place, trace inside the edge of the rectangle. Imagine
the elongated "football" shape in the middle of the rectangle
does not exist. That is for something else. You can now
unpin and remove the paper pattern. Lay it aside for later
as you will need it again. You will note there is a gap
at the top and bottom of the rectangle you just traced
where the "football" shape area was in the way. Just for
good measure, take your ballpoint and fill in this part
of the line to complete
marking in the whole rectangle.
(e)
Next, stack and align the edges of the four 13x18 fabric
rectangles you've cut out. Stack them so that you have
two front sides facing up and two back sides facing up.
The order in the stack doesn't matter right now as long
as the piece with the outlines traced onto it is on top
with the outline facing up.
(f)
Now pin together these four stacked and aligned pieces
using four to six pins (or more) so they will not shift.
The idea here will be to cut out 4 identical pieces at
the same time from one traced pattern.
(g)
It's time to cut along the outer outline (the last
one you just drew freehand). Remember, the INNER OUTLINE
is for sewing, the OUTER OUTLINE is for cutting.
With
these four pieces now trimmed to finished size, unpin
them and separate them, but keep whichever side was facing
up still facing up on each piece.
From now on I will refer
to the printed pattern side of the fabric as the "front",
and the non-printed side as the "back". For
solid color fabric, pay attention to which side is marked
"back" as discussed earlier. If your fabric
is a printed camo, you certainly don't want the pale/blank
side out, you want the camo side out, so pay attention
to which side is which.
 |
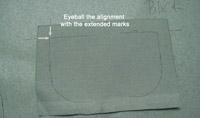 |
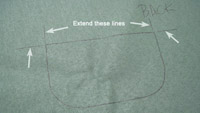
Extend
the corner lines
of the rectangle outline |
Use
the extended corners
to eyeball alignment of
the reinforcing pieces |
Step #4 - Sewing the rectangle
You're
almost ready to do a little sewing. This is the easiest
part. Take the pattern piece you just marked the rectangle
on and place it on top of another pattern piece so that
the two "fronts" are facing each other. Align their edges
and pin them together around the edges, and also near
the rectangle outline. You should now have two cut pieces
pinned together with the "backs" facing out both ways
when flipped over. You are now ready to "join" the two
bean bags front to front before you even sew the two bags
themselves. It might seem illogical, but I assure you,
this is the only way it can be done, and is part of the
"magic".
 |
 |
 |
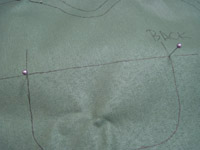
Stick
pins through the
corners of the rectangle
on the marked side |
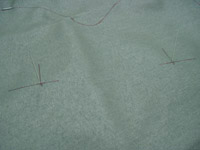
On
the back side, use the
pins coming through to mark
extended corner lines. |
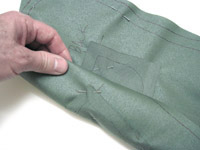
Pin
the reinforcing rectangles
onto both sides before sewing
around the rectangle 3 times |
But
before sewing around the rectangle you should first reinforce
this rectangular area where the two bags join. To
make reinforcements I used the paper pattern to trace
the rectangle outline on a piece of fabric, then added
1/2-inch around that outline to make it larger. I cut
this out and used it as a pattern to cut another reinforcing
rectangle. Then with a ruler I extended
the rectangle outline's upper corners so I could
see them when the reinforcing
pieces were laid over the rectangle. I pinned
these reinforcements to both pieces of fabric before stitching
around the rectangle. A trick to lining up the reinforcing
rectangle on the back side is to stick
a pin through each corner of the rectangle from
one side and mark
where they come out on the other side. This gives
you the corner points to draw lines from to then use for
alignment on the back piece. Remember, this will end up
"inside" the bean bag and won't show.
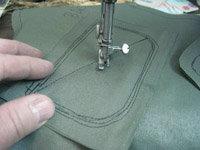
Okay,
fire up the sewing machine and sew along the rectangle
outline, stitching directly over the line all around
the rectangle reinforcing pieces. Then do it again, this
time stitching inside the rectangle about 1/8 of an inch
to create two seams side by side all the way around. Do
this again about 1/8-inch outside the first stitch. Then
stitch an "X" from corner to corner inside the rectangle.
DO NOT SEW THE OUTSIDE EDGES OF THE FABRIC at this
point, sew ONLY in the rectangle.
 |
 |
 |
 |
Stitch
around the rectangle
3 times, then "X" across |
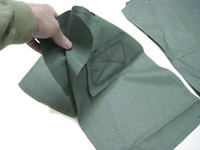
Two
pieces joined
front to front |
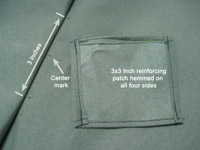
Find
center of crotch width
and mark location for
hemmed 3x3-inch patch |
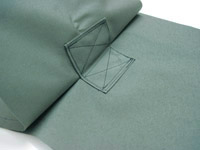
3x3-inch
crotch reinforcement
patch sewn into position |
With
the two initial pieces joined front-to-front it's time
to reinforce the "crotch". Measure the fabric width across
the crotch to find the center. Then mark
a 3-inch wide position to center a reinforcing
patch. Now cut a piece of fabric about 3-1/2 to 4 inches
square, fold over all four edges and hem them neatly into
a 3x3-inch square. Center the square in the crotch and
sew one half at a time onto each piece joined
at the crotch. This will straddle the crotch of the bean
bag and relieve strain on the stitching where the two
bags join.
At
this point we have one half of each bag joined front to
front. Next we'll prepare the other half of each bag before
actually sewing the bag halves together. This includes
installing zippers and "belt loops" to hold a carrying
strap.
Step #5- Preparing the
other halves of each bean bag
We
have two more fabric pieces to prepare. They are the other
halfs of each bean bag. Both pieces will be prepared almost
identically.
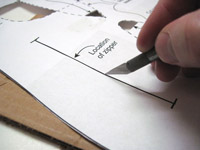
(a)
Locate the line on the paper pattern marking the location
of the zipper. With an Exacto or other sharp edge, slit
this line on the pattern.
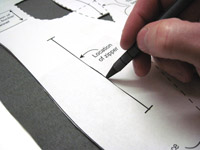
(b)
Next, place the pattern onto the back side of both
remaining fabric pieces and mark
the line for the zipper location through the slit
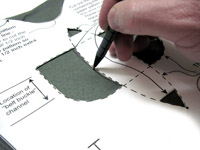
with a pen. Also trace
the outline of the elongated football shape onto
the fabric as well.
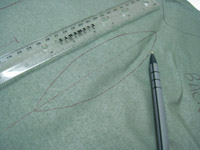
(c)
Remove the pattern and freehand
draw the missing segments for the elongated football
shape onto each piece. Then with a ruler, draw
a center line through the football shape long
dimension. This will become a fold line later for some
stitching.
 |
 |
 |
 |
 |
On
the pattern, slit the
location line for the zipper |
Mark
the zipper location
line onto the back of both
fabric pieces |
Trace
the outline for the
elongated football shape
on the back side also |
Freehand
draw the missing
segments for the elongated
football shape |
With
a ruler, add a center
line to the elongated
football shape |
 |
 |
 |
Cut
zipper opening, fold over
edges and hem to the back side |
Hemmed
zipper opening
and zipper opened one inch |
Pin
zipper into place |
 |
Completed
pieces at this
point in the project |
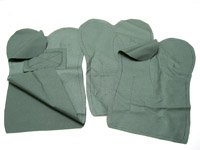
At
this point we have two fabric pieces joined front-to-front,
and two more pieces marked with zipper location and the
"football" shape, as shown in the photo
at left. Soon these will be ready to sew together,
and your bean bags will magically appear, like pulling
a rabbit out of a hat. Let's move on to the next steps.
(d)
It's time to install the zippers. You will do this operation
to both pieces now. My two zippers don't match. One was
bought and one was salvaged from an old worn out jacket,
but it will do nicely for a project like this.
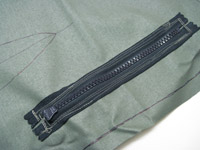 |
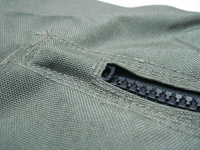 |
Stitch
zipper 3 times
around as shown here |
Finished
zipper - Note how the
pull tab can hide in the pocket |
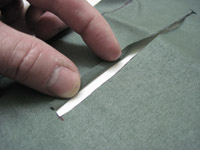
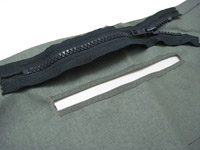
Cut
along the zipper location line with an Exacto or scissors,
then snip across the ends of the line about 3/8-inch.
This gives two "flaps" about 3/16 inch wide.
Fold
these two flaps over toward the back side of the
fabric and hem
the edge. This will be the zipper opening. It
is only 5 inches long, but the zippers are 7 inches long.
That is intentional. It provides a pocket
for the zipper pull tab to tuck into so it's always
out of the way. Also, the opening only needs to be 5 inches,
but I can never find zippers shorter than 7 inches in
the store.
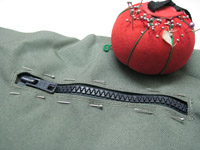
(e)
Unzip
the zipper about one inch, then place the zipper
into the slot so the pull tab just shows on one end of
the slsot. Pin
the zipper into place. Then stitch
the zipper three times around for strength. Remember,
it will have a good bit of pressure on it from the beans
stuffed inside, and you don't want any stitches pulling
loose. When finished, note that the pull tab can easily
hide back in the "pocket" on the end so it's
out of the way, and stays zipped shut.
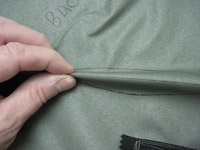 |
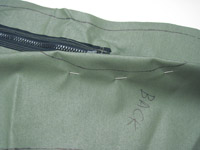 |
Pinch
and fold the football
shape outline along the
center line |
Pin
this pleat along
the curved line |
(f)
This next step is also done to both pieces of fabric.
Create a pucker pleat by pinching
and folding the "football" shaped outline along
the center line you drew through it. Then pin
this together as shown in the photo. Next you
will stitch
along the curved line, tapering out the ends,
then stitching back in the opposite direction directly
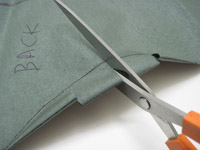
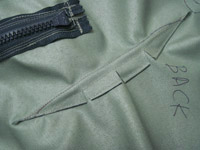
over the first set of stitches. Now make
three equally spaced snips in this flap you just
created, being careful to NOT snip into the stitching.
Keep the snips about 1/4 to 3/8-inch away from the stitches
as
shown in the photo. This will allow the pleat
to lay flatter for stitching it down.
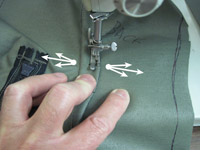
Next,
fold over the snipped pucker pleat, laying it flat against
the fabric. Now stitch
down the pleat while firmly spreading the material,
keeping tension against the original stitches. Sew around
the edge of the snipped flap and again down the middle
as shown in this photo. The purpose of this
is to help remove tension from the original stitches,
because this pucker pleat will help keep the side of the
bean bag top from spreading like a chubby tummy when filled.
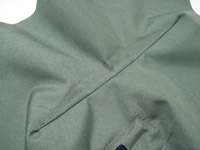
It helps make the bean bag stand taller. This is how
the pucker pleat will look on the outside (front
side) when done.
 |
 |
 |
 |
 |
Stitch
along the
curved line |
Make
3 snips 1/4-inch
from stitches |
Fold
snips flat and stitch
around edge while spreading
the material underneath |
stitch
the pucker pleat
through the middle |
Finished
pucker pleat
as seen from front side |
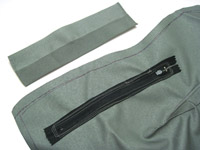 |
 |
1-1/2
x 8-inch zipper flap from
scrap fabric ready to sew on |
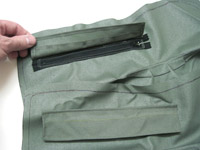
Finished
zipper flaps
sewn inside each zipper |
(g)
Adding inside zipper flaps in this step is optional,
but it should help make zipping/unzipping a full bag a
little easier. Make
two flaps 1-1/2 x 8 inches with hemmed edges from
some fabric scraps. I made mine from slim strips of scrap
fabric that I had to piece together to make them wide
enough. They won't be seen, as they are inside. Sew the
flaps to the back side along ONE edge of the zippers so
they will lay over the zipper. This photo shows two
finished flaps, one flipped up, and one laying
down, as examples.
(g)
Adding my new idea for a strap/handle around the bean
bags in this step is optional. Alternately, you could
sew in side
handles as on version 1 of the Butterfly Bean Bag,
or choose to have no handles at all. Be aware that side
handles sewn into the side seams put a great deal of stress
on the seams and stitching. My new design wraps around
the bean bags like a belt, avoiding any seam or stitching
stresses.
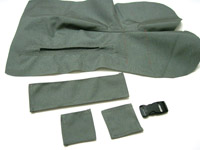 |
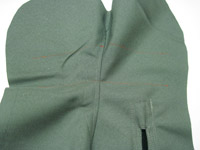 |
3
finished belt loop
pieces ready to sew on |
Belt
loop alignment marks
in orange colored pencil |
To
utilized my new "belt strap" style of handle, first locate
the four marks on the pattern - two of which are labeled
"Location of belt buckle channel". This is the approximate
location of where the strap will wrap around the bean
bags (but not necessarily the correct width spacing apart).
As with any belt, it will need "belt loops",
which is the first thing to make. My snap buckle is a
3/4-inch buckle that fits 3/4-inch nylon web strap. I
determined that it will require belt loop pieces 2-1/4
inches wide to easily slide through. Depending upon your
snap buckle size you may need to adjust this width.
Cut
a piece of fabric 2-3/4 x 16 inches. Fold over 1/4-inch
all around and hem for a neat edge. From this piece, cut
off 7-3/4 inches. Fold over the cut end 3/8-inch and hem
it neatly. This is one finished loop piece 2-1/4 x 7-1/4
inches. Next fold over 3/8-inch on the cut edge of the
left over section and hem. Then cut a piece from that
2-3/4 inches long, fold over the cut end 3/8 inch and
hem it. Now Trim the remaining piece to 2-3/4 inches in
length and hem the cut end 3/8 inch. You should now have
one long and two short finished
"loop" pieces.
(h)
Now the belt loops need to be attached to the front side.
Get out the two bag pieces with the zippers and pucker
pleats. These pieces are likely quite rippled because
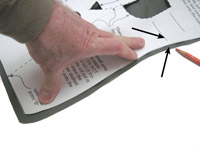
of the pleat, which will make this part a little tricky.
Center the paper pattern on the front side (outside)
of each piece, working from the bottom edge up, and hold
down one side as in the photo so the fabric is
held flat. Transfer the lower alignment mark to one edge
of the fabric with your marker. Then do the same with
the other edge. Now with a ruler, extend a line between
these two marks across the piece. This will locate your
lower loop edge. From this line I measured up 2 inches
on each end and in the middle (your measurement may be
different). Because the fabric is "warped",
I extended the upper line across one half at a time (middle
to one edge, then middle to the other edge). My orange
lines look all crooked in the photo, but things
will line up when properly sewn. This is now ready to
sew on the long 7-1/4 inch belt loop piece.
 |
 |
 |
 |
Hold
down pattern and fabric
to mark bottom loop
alignment on each side |
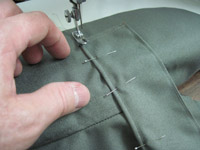
Pin
long loop piece
at least 1 inch from
edge and stitch in place |
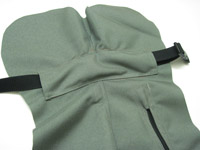
Long
belt loop sewn |
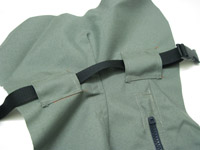
2
short belt loops sewn |
Center
the long loop piece horizontally and align the bottom
edge with the bottom line you just marked. BE
SURE the loop piece is at least one inch from the fabric
edge. You do not want to accidently sew this
loop into the seam of the bean bag when the two halves
are assembled later. Now Pin
the flap's bottom edge into place and stitch it
across the bottom edge. Next, align the upper edge of
the loop piece on one end with your guide mark, pressing
the fabric flat to get it aligned correctly, and pin it
securely. Then pin the other end of the loop piece the
same way. Next, stitch along this newly pinned edge and
the
long belt loop piece is done. Check to see that
your belt buckle slides through easily. If it is too loose,
you can stitch one edge again, but farther in by 1/4 inch
or so to snug it up. Then test the buckle again, repeating
until the loop is the right width. When that is done,
sew
the two short loops onto the other bag piece.
This is much easier because they do not extend across
the pucker area. Leave about 3 inches gap between the
two loops so it is easy to clip, unclip and adjust the
buckle when necessary.
Step #6- Sewing the first
bean bag
 |
 |
 |
 |
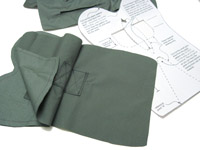
Ready
to mark
the "V" guidelines |
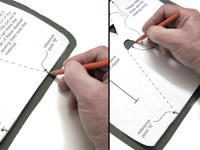
Mark
reference points A & B,
and trace the curved peak |
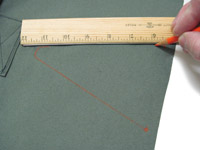
Complete
the guidelines
using a ruler |
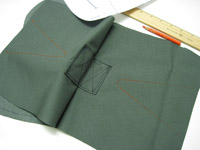
Guidelines
go on both
halves of the joined pieces |
You're
almost ready to make some magic happen, but first there
is one detail to attend to.
(a)
It's time to trace the upside down "V" onto the material.
This goes on the two pieces already joined front to front.
Flip up one side of this joined piece to expose
the "crotch". Line up the lower end of the paper
pattern and make
a mark at reference points A and B where the dashed
sewing guidelines meet the outer edge. Now trace
inside the curved peak cutout hole. Remove the
pattern and use
a ruler to finish connecting these ends to complete
the "V" guidelines. Be sure to mark
both pieces. For the time being this will be covered
and sewn inside the bag, but you will use this "V" guideline
later. (By the way, I used the colored pencil to mark
the fabric on the outside as it is mostly erasable. In
this case the marks will be hidden under the crotch when
finished.)
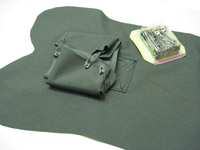 |
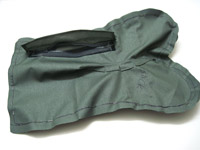 |
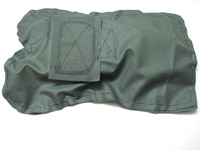 |
Fold
top half into a small
bundle and pin with
safety pins |
With
zipper open and
back side up, align and
pin around edge |
Flipped
over view shows pinning - back side is out |
(b)
Next, fold up the upper half of the joined pieces and
pin
it into a small bundle. I recommend using safety
pins for this. Be sure none of the bundle is too close
to the fabric edges. You do not want it accidently
sewn into the seams. If that happens, you cannot get the
bag turned right side out when finished. Now chose
one of the single pieces with a zipper and OPEN THE
ZIPPER NOW. Being sure the ZIPPER IS UNZIPPED,
place it front down over the piece with the bundle. You
should see the back of the zipper and the zipper flap
facing up.
If you are not using the belt strap handle
from "step 5h", and plan to use side
handles as in this photo, NOW is the time to
insert your handles following
these instructions.
Align
these two pieces around the edges and pin
them together along the edges, placing pins no
farther than 2 inches apart. It is critical you get
these pieces correctly aligned and flat together around
the edges. Because the top piece is puckered and rippled,
this will take some care and patience to get the edges
flat against each other and evenly aligned. Use enough
pins to hold it securely aligned. Be sure none of the
bundle is caught next to pins. When finished pinning around
the edge, flip the piece over and verify the back
side is facing out on both sides. Also be sure
the zipper flap is not caught in the seam.
(c)
Now, double check that the ZIPPER IS UNZIPPED,
then sew directly on top of the outer line around the
edges. Then sew a second time all the way around about
1/8-inch ouside the first stitching. Then do this a third
time around another 1/8-inch outside the second
stitching. This is a safety measure in the event any of
the stitching pulls loose.
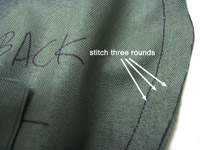 |
 |
 |
 |
| Stitch
3 times around |
Pull
out bundle via zipper |
Remove
safety pins
and pull right side out |
Abbra
Cadabbra....
one bean bag completed |
(d)
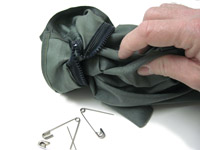
When finished sewing 3 times around the edge, remove all
the pins. Now reach inside the zipper opening and begin
pulling
the pinned bundle out. Do this slowly and patiently,
tugging here and there, coaxing the bundle out so you
can remove
the safety pins. Once the safety pins are removed
it will be easier to pull it out a bit at a time. When
you have all of it pulled out and the bag is completely
turned right side out . . . .
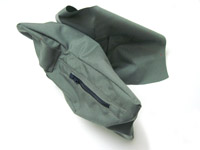
Abbra Cadabbra, you have
one finished bean bag attached to the other half
of the second bean bag.
 |
 |
Fold
1st bag into a bundle
& pin top piece like before |
Stitch
seam, unpin and pull
out to complete 2nd bag |
Step #7- Sewing the second
bean bag
Now
you will essentially repeat steps 6b, 6c & 6d on the other
half of the bean bag.
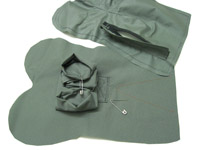
(a)
Turn the first finished bean bag up on top and fold
it over into as small a bundle as you can. This
may be a little harder to accomplish than the first time
because the bag is bulkier, and it has a zipper. You must
be sure the bundle and zipper flap do not get caught in
the seam when you sew this one.
(b)
Be certain the piece you're pinning on top has the back
side up, and that the ZIPPER IS OPEN just like
before. Pin it carefully, being sure to align it correctly
around the edges, that the zipper flap is not caught in
the seam. Then sew the seam around the outside line 3
times as before.
(c)
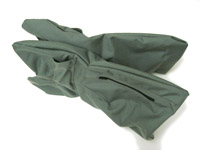
Remove the pins, reach into the zipper opening and pull
out the bundle to access the safety pins. Take out the
safety pins and patiently tug on the bundle until the
piece is turned completely right side out. Now you have
two
bean bags back to back, almost ready to
fill.
 |
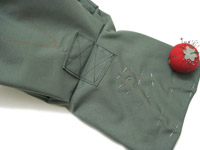
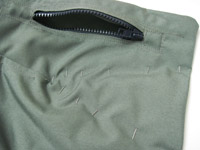
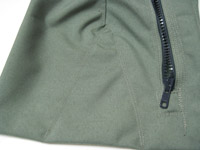
The
tubular bottom design
improves rigidity and cuts
weight by 4 pounds. |
Step #8- Sewing the "V"
Now
it's time to stitch those "V's" you traced onto the outside
of both bags. This is the original weight-saving idea
that sparked my creation of version 1 of the Butterfly
Bean Bag shown in the photo
at the left. It is one of the secrets that cuts
down dramatically on the weight of this large bean bag.
 |
 |
 |
Fold
up top bag and
pin lower "V" guideline |
Flip
over and check
opposite side of pins
for folds or wrinkles |
Double
stitch along
"V" guidelines |
(a)
Fold
back the upper bag out of your way to access the crotch
facing up. Pin along the "V" guideline on the
lower bag, pulling the fabric smooth on both sides so
you don't pin folds and wrinkles into it. Check
the back side also for folds and wrinkles where
it's pinned before you stitch. The point of the "V" is
very close to the end of the pucker pleat so take care
the wrinkles here don't get caught in the stitching when
sewing along the "V" guideline. Also, be sure the zipper
flap is not in the way and won't get caught in the stitching.
Now double
stitch along the "V" guideline. This will seal
off part of the bean bag so filler cannot get in there.
Remove the pins when done.
(b)
Flip the bag over and do the same thing to the other bag,
being careful not to pin or stitch any folds or wrinkles,
or the zipper flap, into the "V" guideline stitching.
Remove the pins when done and you are finished with sewing
the bean bags.
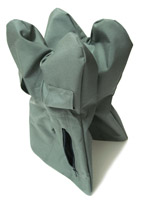 |
The
Butterfly Bean Bag
version II, ready to fill |
 |
The
finished bag with
nylon web strap handle |
 |
| nylon
web strap as handle |
 |
Dried
beans and 1/2-inch cubes
of dense foam fill the bag |
Finishing Touches:
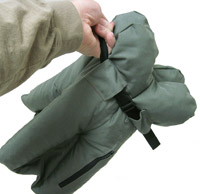
All
that's left to do is sew one side of your snap buckle
to the nylon web strap, thread the other side of the snap
buckle onto the strap and slip it into the belt loops.
This serves as
the carrying handle, which unlike side handles,
cannot create stress and pull out stitches. The Butterfly
Bean Bag is ready to be filled, and put to use.
The
scary truth is that other bean bags this size could require
over 16 pounds of dried Pinto beans to fill them. With
the sealed off "V" in the original Butterfly Bean Bag,
it saved up to 4 pounds of beans. The original bag still
weighed in at 13.5 pounds though, and even that much weight
can be unwieldy. I decided to extend my experiment from
my Magic Bean
Bag project, where I used foam cubes as alternate
filler. I want to see if I can cut down the weight of
this huge bean bag to just 8 or 9 pounds. That would be
a major improvement.
I
used small 1/2-inch
cubes of stiff foam to replace up to one third
of the volume normally taken up by dried beans. I diced
up foam cubes totalling the same volume as a 4 pound bag
of dried Pinto beans. These cubes total just 1.2
ounces while taking up the same space as 4 pounds of beans.
I put half the foam cubes ( .6 oz) along with 4
pounds of dried beans into each side of the completed
version II bean bag. That's a total of 8 pounds 1.2
oz ( or 129.2 oz ). Then I weighed the filled bags
(including belt). It weighed in at 8 pounds 5 oz. If I
deduct the bare weight of the empty bean bag with belt
( 5.5 oz) that leaves .5 oz less than 8
pounds ( 127.5 oz ), so it's within 1.7
oz of the expected combined weight. While my scale isn't
perfect, that's close enough for my purposes.
If
I tried hard, I might be able to cram another 1/2 pound
of beans into the new bean bag. That would still make
it less than 9 pounds, maximum. So I have achieved no
less than 4-1/2 pounds weight savings with the new design
over the old design, which was already several pounds
lighter than other bag designs of the same size.
At
least 4 pounds of the weight savings is due to the use
of the foam cubes. The remaining 1/2 pound weight savings
came from a slightly slimmer pattern, and a larger pucker
pleat, which added to the overall difference in girth.
Overall, this new design is a major improvement.
|
| |
|
|
 |
|
 |
