|
|
|
|

Super-telephoto Folding Lens Hood
and a different lens cap
|

|
Folding
hood and new lens cap
for a Canon 500mm f/4L IS |
Yep...this
is another project to make something for my 500mm lens.
Actually it's two somethings... a folding lens hood, and
a protective lens cap (more about the lens cap in a bit).
The idea of a collapsible folding lens hood was not mine...well,
what I mean is, I didn't think of it first. There is the
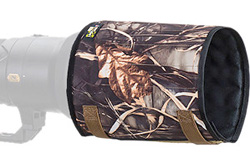
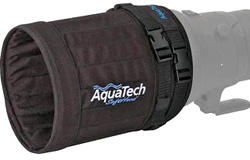
"TravelHood" made by LensCoat, and AquaTech makes their
"Soft Hood" product. I wasn't aware of either product
until I heard about the "TravelHood" on a photography
forum and checked it out. It is actually a good idea....
a hood that will fold flat and save space. And for $110-$150
either product is a much cheaper alternative to replacing
a damaged or lost Canon 500mm hood than getting another
Canon hood for well over $500.
 |
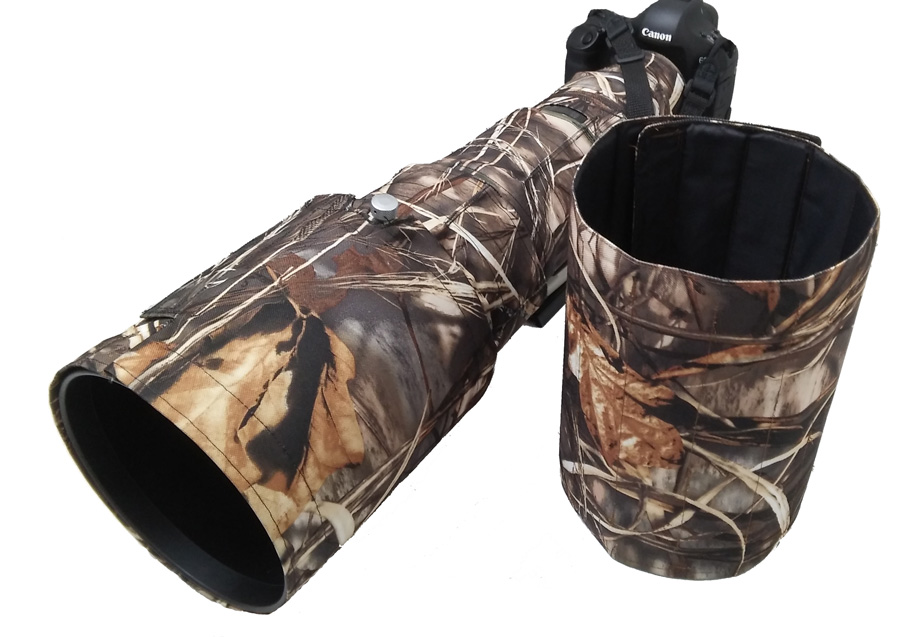
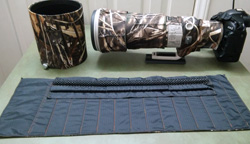
Mounted
to the lens is the original
Canon hard hood with my DIY camo cover.
Next to it is my new DIY folding hood
|
Though
my hood did not need replacing, I had for some time been
hoping to find a way to more easily fit my 500mm lens
into my Bataflae 32L backpack. If I didn't have to carry
it with that huge hood, it would fit much better. A folding
hood sounded like an ideal solution. But once again, I
ran up against that wall that separates my wants from
my wallet. Am I REALLY going to pay $110-$150 for something
I can easily make with less than $10 worth of fabric and
a sewing machine? Yeah, well, you already know the answer
to that question. Heck, you could buy the material AND
a brand new basic sewing machine for less than $150. Let's
get real, folks.
The
general concept is very simple - flat slats sewn between
an outer camo material and an inner non-reflective black
material, which then wraps around the lens to form a hood.
The slats must be stiff, yet flexible while being strong
and unbreakable, and completely waterproof. The LensCoat
"TravelHood" uses velcro straps to hold it into shape,
while the AquaTech "Soft Hood" uses buckled straps. Frankly,
the buckled straps appeared to be overkill (and awkward)
for a lightweight hood, and the LensCoat hood's huge velcro
straps gave it an unfinished, "slapped together" apperance.
I had a better and cleaner-looking idea in mind for attaching
my folding hood. Both products appear to be made from
nylon or polyester Cordura type fabric that is water repellant
and sturdy. I already had some remnants of 600 denier
polyester Cordura camo fabric on hand, the same as I've
used for so many of my other projects. All I had to do
was figure out what to use for the slats.
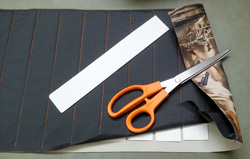 |
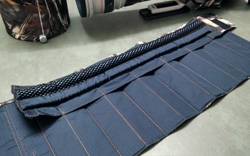
The
first assembly - pockets with
the vinyl slats inserted
|
With
a bit of head-scratching, I finallly remembered some vinyl
strips I had in the garage. I had recently put vinyl leaf
guards on my rain gutters, but the guards were a little
wide for my gutters. So I trimmed 1-1/2 inches off one
edge on all of the leaf guard sections to fit better.
It turned out those leftover strips, just under 1/16 inch
thick, were exactly what I needed - waterproof, very flexible,
yet stiff enough in 9-inch lengths to spring right back
into shape when bent. It would work perfectly for the
slats. The width (1-1/2 inches) was just right
as is. I cut 13 pieces about 8-1/2 inches long and smoothed
any rough edges. Your project may take different lengths
or a different number of slats, but for my 500mm I calculated
that 13 x 1-1/2 inches would do the trick.
First Assembly - Hood Slats:
After
taking measurements of my lens and the original hard hood,
I cut some Cordura camo and black ripstop nylon material
25-inches by 9-1/2 inches for the new folding hood (yours
doesn't have to be camo). Both measurements are oversized
to allow for hems and flaps for velcro (particularly
on both ends where it wraps around into a cylinder).
I sewed the Cordura camo face to face onto the ripstop
nylon around three edges (one long side and both short
sides). Then I turned it right side out so the camo is
facing out (which hides the 1/8-inch hems inside).
 |
|
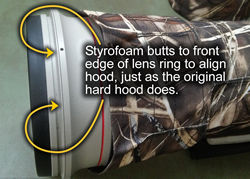
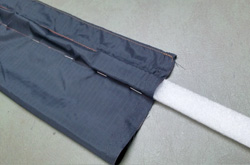
Styrofoam
strip butts to
lens ring for alignment |
 |
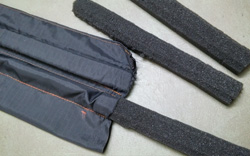
|
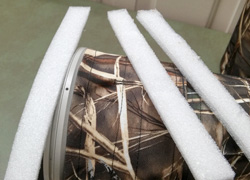
3/16
inch thickness and 3/4 inch width
is sufficient for styrofoam strip |
|
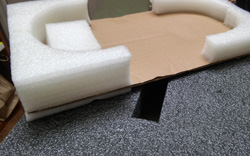 |
Examples
of the shiny "plastic"
type styrofoam to use |
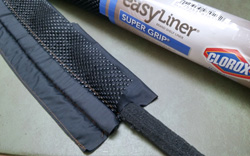 |
| Shelf
liner used on alignment strips |
Next
I marked lines 1-9/16 inches apart on the black ripstop
side to show where the stitching goes to form the pockets
for the slats. Be sure to leave extra material on both
short ends for overlapping where the velcro will hold
the ends together into a cylinder. Your measurements will
be different than mine, depending upon the lens you're
making it for. Then I slipped the 13 slats into the pockets
I just stitched. This first
assembly is shown in this photo. It's important the
pocket width is sized so the slats just slip in snuggly.
Second Assembly - Alignment Strip:
The
alignment strip fits around the lens ring and holds the
hood in place and properly aligned on the lens. I started
with a piece of black ripstop nylon long enough to wrap
around the lens ring, and wide enough to form two channels - one
for the styrofoam and one for gray foam strips, plus flaps on
both long sides to attach it to the hood slats assembly.
I found some "plastic"
type styrofoam (used for packing in a box of something
I'd bought recently). Be sure you do NOT use the brittle
type made for arranging artificial flowers (won't work
so well). The styrofoam
I found was 3/16-inch thick (just right for my
lens), so I cut 3 pieces 3/4-inch wide by 7 inches
long. End to end they would wrap around nicely. This will
be used to butt
against the lens ring where the hard hood hooks on.
If you don't have this type of styrofoam, use something
that is firm so it will butt against the lens ring and
hold it's shape, yet it must be flexible to wrap around.
If it's not so flexible, you can cut notches in it on
the inner face so it can wrap around the lens easily.
Also
needed is some dense gray foam (which I salvaged from
equipment box packing) to serve as the padded fitting
on the alignment strip to hold
the hood onto the lens. I also added a 2-inch
wide strip of black shelf liner (like I used in
my lens
sleeve project) over the foam strip to provide
some grip to the hood when it's strapped onto the
lens.
While
working on this project I discovered that it can get tricky
when working with circumferences. Inner and outer circumference
measurements will throw you off quickly. When the padded
alignment strip piece was wrapped onto the lens and butted
end to end, it fit just right. But when laid flat against
the hood slats piece, it came out about 3/4-inch short
of where the ends should have been on the slats piece.
I was surprised, since the slats are less than 1/16-inch
thick. I did not expect that much difference in the outer
circumference. Now I understand why the LensCoat and AquaTech
products were all curled up. It has to be made that way
because of the difference between the inner and outer
circumferences. So, I had to build that curl into my DIY
folding lens hood.
 |
 |
Finished
alignment strip with
shelf liner installed
|
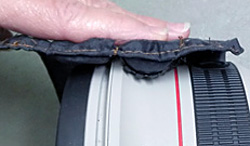
How
the alignment strip fits
onto the lens ring |
 |
 |
Alignment
strip ready to attach
to hood slats assembly |
Alignment
strip has velcro flap added and
is attached with circumference adjustments |
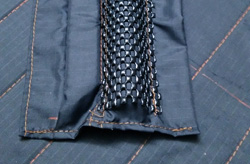
 |
Pinning
and sewing channel
for
styrofoam inserts |
 |
Marking
and sewing channel
for foam inserts |
Fitting It Together:
The
necessary curl was built into the unit by stitching the
alignment strip assembly onto the hood stats assembly
with the slats puckered up about 3/16 inch at each stitching
point, as shown in this
photo. Your adjustment amount may be different, and
will take a little calculation. My alignment strip fit
was about 3/4 to 1 inch short of where it should line
up on the ends of the hood slats assembly. I divided that
by the number of sewing attachments points (the gap
between every other slat), which in my case was six.
That came out to about 3/16 inch per attachment point.
With my slats spacing at about 3-1/8 inch per 2 slats,
I placed sewing marks on the alignment strip assemby every
2-15/16 inch. This forced the slats to accordion a little
to make the sewing marks align with the gaps between slats,
providing the adjustment I needed. I realize it's difficult
to explain here, but looking at the
photos should help make it clearer.
Note
that the ends of the alignment strip are not sewn down.
On one end of the alignment strip I added velcro loops,
and the other end I added a flap with velcro hooks. This
velcro holds
the ends of the alignment strip together on the lens
and makes the hood fit snug, hold tightly and align properly.
With velcro added to the end flaps of the hood slats assembly,
it holds
the wrap-around overlap of the slats in position.
This completely hides all indications of any kind of mounting
straps, making for a very neat and professional-looking
hood.
 |
 |
 |
 |
Pull
alignment strip ends close together
and connect velcro flap |
Alignment
strip velcro flap is
closed, holding hood firmly |
Next,
fold over hood flaps connecting
velcro strips on hood |
Alignment
strip is completely hidden,
as are the hood's velcro strips |
 |
 |
| LensCoat
TravelHood |
AquaTech
Soft Hood |
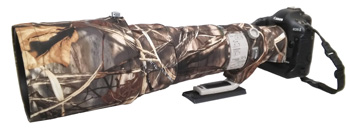 |
| Original
Canon hard hood with camo cover. |
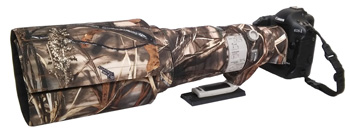 |
| The
new DIY folding hood |
The
new
DIY folding hood has no cumbersome straps and buckles,
or unsightly velcro strips on the outside like the LensCoat
and AquaTech products shown at left. In the photos at
right, compare the original
Canon hard hood with the new DIY folding hood. The
DIY folding hood really looks much neater and sleeker
than the commercial alternatives. The folding hood does
extend backward over the lens about an inch farther, making
it appear slightly longer. But the folding hood extends
in front of the lens the same distance as the original
hood. It is also the same diameter.
Not
only does this hood look better, it weighs only 7.9 oz.
The AquaTech Soft Hood for a 500mm lens weighs 12.9 oz.,
while the LensCoat small TravelHood for a 500mm lens weighs
7.2 oz. (just 1/2 oz. less than the homemade version).
I
was very pleased with how this project turned out. But
it looks so good, I'm afraid I'll forget it's not the
original hard hood and try to stand the lens on end on
the hood. That's the one caveat with these folding hoods,
although AquaTech does claim you can do that with their
hood. It's something to consider.
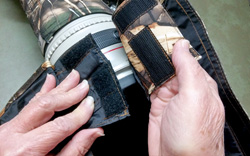
So, What About The Lens Cap?
 |
 |
 |
left: Lens cap for hard hood
right: Lens cap for lens |
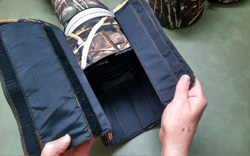
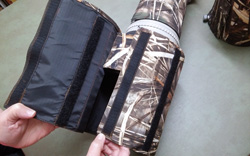
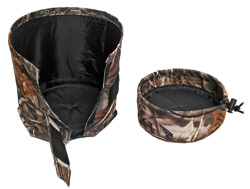
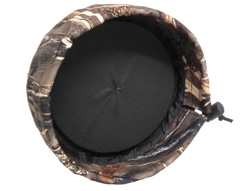
Inside
view of lens cap |
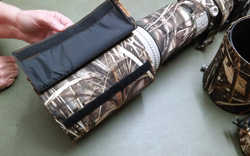
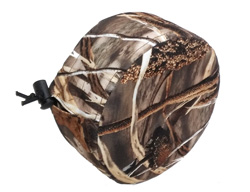
Outside
view of lens cap |
Yeah,
there is that issue of a lens cap, now that you realize
the one you used over the hard hood won't work over the
bare lens. The whole idea here was to be able to pack
the 500mm without the hard hood, but that's not a good
idea without a lens cap. DIY to the rescue once more.
After having previously made my own lens
cap for the hard hood, it wasn't that hard to make
one for the lens itself.
|
| New
lens cap and folding hood combo |
I
found a lid from a large plastic coffee can that fit the
lens diameter nicely. I also had a plastic lid from some
sugar cookies that came in a plastic bowl. The two lids
nestled together perfectly to form a base. Then with a
coping saw I cut three disks from 3/32-inch plywood and
sanded the edges nice and smooth. Two of the disks were
slightly smaller than the inside diameter of the lens.
These were glued together with wood glue and covered with
ripstop nylon. They just fit inside to insure centering
of the cap. The third disk was cut to the outside diameter
of the lens. Along with the plastic lids cupping the outside
of the lens, it insures the cap cannot get pushed into
the lens. With the lids sandwiched between the plywood
disks, I have an extremely strong and lightweight protective
cap. Next I covered the lens cap outside with a bit of
foam padding and some Cordura camo fabric to give it a
professional look. The final touch was to use 1/8-inch
bungee cord and a cord lock to snug up the cap on the
lens. It's small, light, and very strong, which makes
packing the lens in my backpack case so much simpler and
easier.
|
| |
|
|
 |
|
 |