|
|
|
|

Camouflage
Camera Bags modified from Duck Blind Bags
|
Don't
bother trying to find a camouflage camera bag at a camera
store or photography supply. I've only seen one, and it
was in a hunting supply store. It was made to carry a
small digital camera, not a DSLR and lenses. I really
wanted a good camouflage camera bag or two for my nature
photography.
While
looking for some camo blind material, I stumbled across
this Avery brand duck blind bag in a Walmart on the Outer
Banks. It happened to be duck hunting season, and I guess
I got lucky. There were several styles, but this one seemed
suited to my needs (a single camera body and two lens,
flash, batteries and assorted small accessories). Now
that I knew these were available, I finally had some idea
where to look. Soon I found a couple more suitable duck
blind bags at a Gander Mountain hunting/fishing retailer.
The
only problem with these duck blind bags was that they
had no dividers like you would find in most camera
bags, so it now became a do-it-yourself project. The Avery
bag shown here is that first purchase, bought in the middle
of one of my photo expeditions to the Outer Banks of North
Carolina. I used it for a week "as is" and it worked out
great, though I knew it would work even better with a
divider in it.
I
made a divider the right size for my equipment by covering
some cut and folded corrugated cardboard pieces with 1/8
inch foam for a little padding. Then I covered them with
the camo material I had. It didn't have to be camo on
the inside, of course, but it's what I had on hand. The
left photo shows the bag
with the divider set inside and the far right photo shows the bag
and divider with the equipment inside
.
The
next bag I purchased is this "Guide
Series" model at (shown below) from Gander Mountain,
a hunting/fishing outdoor retail supply. It is very similar
in design and construction to the Avery Outdoor bag above,
but is larger, with about twice the inside volume of the
smaller Avery bag. This serves well when I need to take
more photography stuff for a longer day. It also had no
dividers, so I made some.
This
divider project was a little more ambitious, as I used
thicker
padding on the bottom and sides of the dividers,
and added velcro flaps to allow
different configurations for larger lenses. (I
figured I could never have too much padding around an
expensive lens.) I won't try putting such thick
padding on corrugated cardboard again, as this was a bear
to sew. I think next time I'll just cover the padding
and the hard divider panels separately. The above photo
shows this larger bag
with the divider panels and padding inserted.
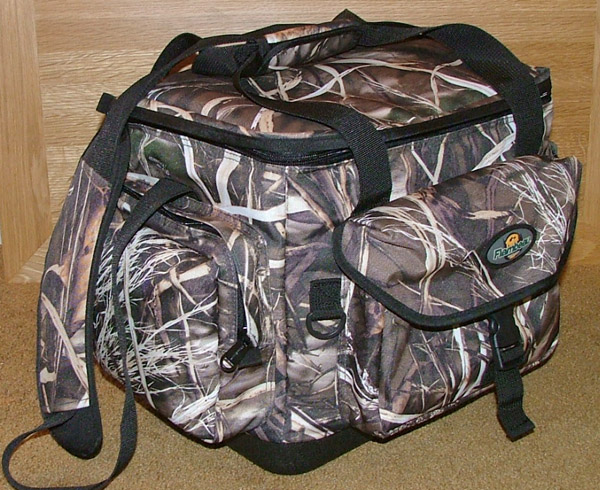
The third
was purchased from Gander Mountain also. It's made by Flambeau
Outdoors, shown in the two photos below left. This one
is a little different in design and shape, with larger pockets
on the outside, though it's about the same volume as the large
bag above. It also happens to be in the Advantage Max-4 HD camo
pattern, which is a match to the other camouflage clothing and
items I use most.
Initially
I used this as an all-purpose bag for gloves, manuals, hats,
extra clothing, extra electronic gadgets, etc., just as a camouflaged
bag to augment my camera bags when necessary. It has a hard
plastic bottom "pan" made onto it to guarantee waterproofing
on wet ground, although the other duck blind bags are also supposed
to be waterproof. Some even claim to float, though I would never
try such a thing on purpose with camera equipment. I did not
make any dividers for this last bag since it was not really
meant for use as a camera bag.
Later,
when I added my prime lenses to the collection, I suddenly did
not have enough room for all of them. I soon realized this taller
bag would be ideal for my newest equipment since the only way
I was going to get all my stuff in one bag was to pack the lenses
vertically instead of trying to stack them in horizontal layers.
Digging them out from under each other would have been a real
hassle.
This third
bag, shown finished at right, proved to be just the right height
to stand them all on end. It's large enough to hold my 7D and
5D mkII (one of them with lens mounted), plus four lenses (300mm
f/4L IS, 70-200mm f/4L IS, 24-105mm f/4L IS and 17-40mm f/4L).
Also in with the lenses are two 1.4X TC's, a set of 3 Kenko
extension tubes and my flash unit. The side pockets carry USB
cables, remote cable release, battery tester, AC/DC charger,
LED headband lamp, GPS, extra camera plate and wrenches, AA
batteries, polarizer filter, and other assorted accessories.
Obviously the 500mm would have to be in its own bag, which had
already been taken care of in this
project.
I had learned
a thing or two from making the dividers for the first two bags,
and this time I ended up with a bag I'm especially pleased with.
I used some nice black nylon material to cover the foam dividers,
which looks almost exactly like what you would find in a commercially
made bag. It's slick and smooth, and the lenses slide in and
out silky smooth. Everything sits on a 1-1/2 inch thick foam
pad in the bottom of the hard plastic pan base for excellent
protection.
The one
drawback of the bag was that it came with just two slim pockets
in the lid, only thick enough to hold perhaps a note pad. One
side had a zippered net pocket too, but none of them were suitable
for batteries or memory cards. After some thought I came up
with a solution. Thin stuff goes in the zippered net pocket
(lens cloth, camera internal backup battery spare, small note
pad, etc.). I used the two slim pockets to mount two flaps onto
the lid. On the left side of the lid I put a padded
foam flap over the net pocket that velcro's shut. This
pad cushions the camera body for extra protection and keeps
items in the net pocket from rubbing on the body.
On
the right side of the lid I put a flap
with elastic pockets to hold batteries and memory
cards. I added green and red ribbon to mark pockets for
charged or discharged batteries, and full or empty memory
cards. They will easily hold four batteries and four cards,
or more if necessary. This battery/card pocket flap is
held shut with a simple elastic
strap so it doesn't flip open when the lid is
opened or shut. I'm particularly pleased with how well
it worked out.
|
| |
|
|
 |
|
 |