 |
|
|

Two-sided Ghillie Blanket
with zippered ripstop nylon cover
|
When
I finished my two Ghillie suits, two Ghillie lens covers and
two Ghillie tripod skirts, I had some Ghillie thread and a 4.5
foot by 5 foot section of netting left over. The netting piece
was not large enough to make a full Ghillie blanket, but I didn't
want to order more netting. A new net would be too large for
a blanket and I would still have leftovers.
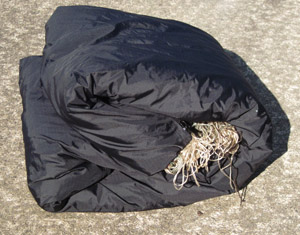 |
The
finished Ghillie blanket folded for storage.
(It's so soft and puffy, it actually does
make a fair pillow)
|
I
finally decided to just use what I had and make a smallish blanket.
It was certainly large enough to cover equipment, or to serve
as a quick throw-cover over the camera and tripod, or even to
cover me if I was seated or prone and already partially hidden.
Since I had Ghillie thread in both greens and tans left over,
I thought perhaps using one blanket for both colors might work.....
just make it two-sided. That in itself is not so original, I
suppose, but I was concerned that the netting would get hung
on everything (tripod, camera, belt buckles, buttons just to
name a few things) if used without a material backing. Since
both sides would be covered in threads, even the Ghillie thread
could easily get tangled and hung on something, and there I'd
be trying to fight my way out of it.
|
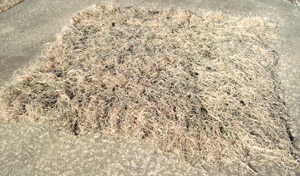
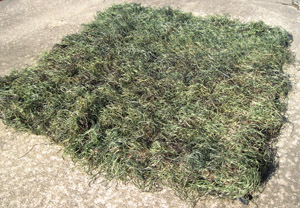
(1)
We start out with the blanket laid out on the driveway
with the "winter grass" (tan color) side up. |
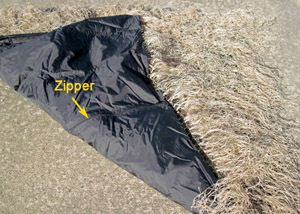 |
| (2)
Flipping up one corner reveals the black nylon backing
and zipper running across the middle. |
To my good
fortune, a family member was cleaning out kids stuff and had
an old sleeping bag to get rid of. It was a little worn and
ragged, but the 6-foot zipper on it was in perfect condition.
This was a heavy duty reversible zipper so it
worked from inside or outside. I realized this was the answer
to my problem.
Now comes the idea that makes this rather unique, I think. I decided
to use some black ripstop nylon material I had left over
from other projects to make a nice slick backing for the blanket.
I would use the zipper to open the backing so I could turn the
blanket inside-out. That way, no matter which color side was
out, the back side would be sealed inside the nylon covering.
This would completely avoid any tangling. It would also prevent
any backlighting from revealing a silhouette or motion under
the blanket.
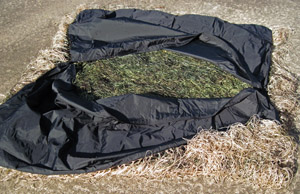
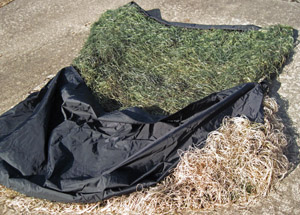
(3)
With the blanket now flipped over so the "winter grass"
(tan color) side is down and the black backing is up I've
fully unzipped the zipper to show the green Ghillie thread
inside. |
 |
|
| (4)
Here I've grabbed two corners inside and flipped half
of the green side outward so the black cover on that half
is now flipped under the blanket. |
|
First I
tied my tan mixture of Ghillie threads to one side of the netting
just as I did for my other Ghillie
projects. Then I flipped it over and tied the greens to
the opposite side of the netting. That was the hard part, and
it took many hours. Next I removed the zipper from the old sleeping
bag by taking out the stitching that held it on. I only needed
a little over 4 feet of the zipper, so I snipped off the excess
length from the "tail end" with wire cutters. The "tail end"
is the end where the zipper stops when it's fully unzipped.
It was a vinyl zipper, so snipping was easy. This cut end would
be sealed under material when sewn onto the blanket, so the
zipper could not slip off the end when unzipped. The other end
where the zipper stops when zipped shut was not altered. It
already had a built-in stop.
Then I measured
and cut out two pieces of the black ripstop nylon material,
each measuring the full width, but only half the netting length, plus an extra inch or so on all sides.
I used this extra inch for the hem, folding it over on all the edges and sewing it to make neat edges to eliminate any
fraying. Next I sewed a piece of the nylon to each side of the
zipper, assembling it into the full-sized backing for the netting.
Now I attached
the zippered backing to the netting by sewing it around the edges on all four sides. Since the
zipper is reversible and the nylon is the same on both sides,
it didn't matter which side of the backing was up. It works
both ways.
|
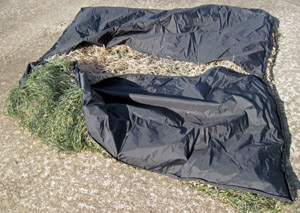
(5)
Here I've completed pulling both halves of the green side
outward so all the black backing is now underneath. |
 |
| (6)
With the blanket now flipped over you see the green side
is down showing the black backing. The zipper is still
open showing the tan threads are now inside. Once I zip it shut the tan will be sealed inside the cover and can't
get tangled on anything. |
Thus I assembled
what you might think of as a zippered pillow case, with the
back being the black nylon, and the front being the netting/Ghillie
thread. The difference is, the zipper does not go around one
edge as you might expect on a pillow case. Instead it goes across
the middle of the back side.
That was
all I had to do. The most tedious and timely part was tying
the Ghillie threads. Making and installing the backing was the
easy part.
The numbered
photos on this page step you through how the Ghillie blanket
looks and works. Hopefully the explanations make it clear. It
only takes about a minute to convert it from one color to the
other. With the two colors I can convert it to match whichever Ghillie
suit I'm using at the time. When I use the blanket the black
nylon side is always against me or the equipment, and I don't
have to worry about snagging the netting or threads. That makes
it easy to adjust its position. It also makes neatly packing away this
Ghillie blanket a simple and easy task. |
|
 |
|
 |
