 |
|
|

Constructing A Ghillie Suit for Wildlife Photography
Applying the Threads to Suit #2- The Winter Grass
Suit
Jump to: page
one page
two page
three page four
|
(continued
from Page Three - Constructing A
Ghillie Suit for Wildlife Photography - Applying the Threads
to Suit #1- The Green Suit)
 |
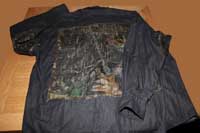 |
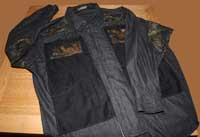
Front
& back of second shirt, with
vent panels and zippers, ready
to tack on the 1-inch netting
|
After the experience constructing
the first suit, things went smoother preparing the second suit.
I already knew what I needed to do and how to go about it. It
took me only half the time to install the vent panels, pockets,
zippers and velcro on the shirt and pants. The only thing that
didn't go any faster was cutting and sewing on the 1-inch netting,
though it went a little "easier" this time. That is
still a tedious job, no matter how many times you do it. However,
on this suit I came up with a tip worth its weight in gold,
which made fitting and tacking the netting faster and easier.
Instead of trying to pin the netting into place to keep it positioned
while tacking it, I found that little pieces of painter's
masking tape would hold the netting in place perfectly well.
The tackiness is perfect for good hold, but pulls off easily
enough to reposition and adjust the netting over and over, making
it reusable for quite awhile. You could try regular masking
tape, but I believe it is either TOO sticky or not sticky enough
(depending on the quality of the product) and tears too easily.
Get the blue kind for paint masking. This one idea alone saved
me a world of time and hassle. (Donations for this time-saving
tip are gladly accepted).
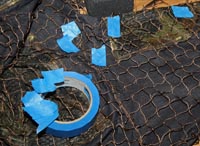 |
Painter's
masking tape holds
net in position while tacking |
I also gave
some thought to how I would match my gloves to the suit, since
all my camo gloves were much greener in tone than the "dead
grass" suit I was making. I had never seen camo gloves in a
"tannish" tone. I also did not wish to dedicate both
a thinner pair (warm weather) and heavier pair (cold weather)
for each and every color of Ghillie I might create by putting
netting and Ghillie thread directly on the gloves.
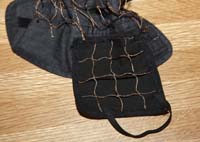
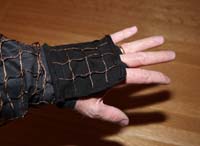
I came up
with the idea of sewing a patch to the shirt cuff that extends
out over the back of the hand. I hemmed two 4x4-inch pieces
of material with the netting sewn into them, and sewed one to
each cuff. I added a piece of 1/4-inch wide black elastic to
the end to serve as a finger loop to hold it in place on my
hand. The elastic is more comfortable than any sort of cord
for this purpose, and stretches to any fit. This way it will
work over whatever gloves I happen to use. It even does a decent
job of hiding bare hands in the event you don't want to wear
gloves. I cut some of the 20-inch Ghillie thread in half and
tied these shorter pieces to the patch netting on every side
of every netting square. These shorter threads cover well enough
and don't tend to get in the way. I really did not want anything
to hinder my grip or tangle on my fingers while handling camera
equipment. By the way, if you are using netting with larger
than 1-inch squares, you'll need to find some way of getting
a tighter grouping of threads, or else you won't have enough
thread coverage for such a small area. This needs to be fairly
dense with threads.
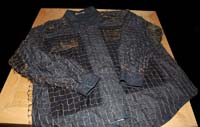 |
Netting
completed on
shirt number two |
 |
 |
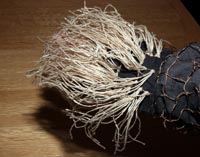 |
Close-ups
of the pad to cover the hands and gloves
|
I constructed
the second boonie hat/hood virtually the same as the first one,
except that I took a slightly different approach with the face
mask area. This time I wrapped the mosquito netting all the
way around and cut out an opening to see through. It's important
to remember that good visibility from the hood is far more of
a priority for photography than when used for other activities,
such as paintball or hunting. For wildlife photography, it's
much more important to see better than it is to hide your face
well. Don't misunderstand though. Keeping your eyes and face
hidden as much as possible is still important, but if you can't
see to frame and focus, that's a real problem. In any event,
your face is behind the camera much of the time anyway, which
serves to hide it to a great extent without an interfering veil
of netting, or a cascade of camo thread dangling in front of
your eyes.
 |
 |
The
"kit" package (with 5x9 net,
7 thread bundles & instruction
sheet) and two additional thread
bundles. (Shirt base not included) |
 |
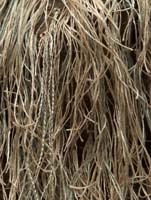
Comparison
of burlap
and synthetic threads |
With the shirt, pants and hood prepared
and ready, it was time to tie the synthetic threads to the second
suit. The synthetic thread I ordered for this came as part of
a "kit". Since I needed another 5'x9' net anyway, the kit provided
one, along with a selection of thread colors, and at a better
price than buying the items separately. (Just to
be clear on this, the "kit" does not include a "base".
You still must prepare a "base" of shirt/pants or
jumpsuit on which to build the Ghillie.)
The synthetic thread bundles in the
kit are 1/2 pound each, and are pre-cut about 20 inches long.
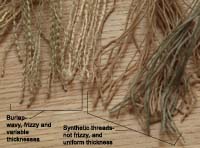
In the photo comparison between
burlap and synthetic threads, you can see how the burlap
threads are not of a uniform thickness, and hold a sort of zig-zag
shape from having been woven into fabric. I had considered mixing
the burlap and synthetic threads, but the detail photo on the
far right shows how these wavy,
zig-zag burlap threads stand out like a sore thumb next
to the smoother synthetic threads.
 |
Every
square horizontally,
every second square vertically.
Also shown is a 3-thread
bunch before tying. |
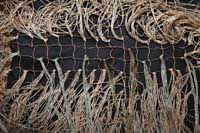 |
The
color mix of tan,
gray and light olive |
Just as
I did for the first green suit, I began applying the threads
to the hood first since it was the smallest item. I wanted to
get a good feel for how the colors should be mixed before I
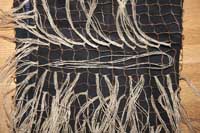
jumped into the larger pieces. Using just 3 threads per bunch
(which always looks a bit skimpy at first) I tied them onto
every second row of netting squares going vertically, and on
every square going horizontally. The photos at left showing this
pattern on the pants leg should make this clearer. Also, I alternated
between horizontal and vertical netting cords on every other
row across when tying to the net, also shown in the photo. There
is no rule how to go about this, and you can tie yours
as you see fit. In hindsight, I actually could detect no visible
difference with or without alternating vertical and horizontal
cords on the 1-inch squares. The size of your net squares could
affect this greatly though, so you'll need to adapt to whatever
netting you're using. I know it looks very sparce in the photo,
but it's surprising how well this covers once the threads are
dangling down and jumbled together. This density works well
for vertical surfaces (shirt front and back, and pant legs).
However, in some areas it needs to be denser than this. For
the upper edge of the sleeves, the top of the shoulder, and
top of the boonie hat/hood you should add short threads as I
noted on the first suit. In these places the thread falls in
several directions, not just straight down, so it gets spread
out rather thin on the "top" surfaces. Along all edges of the
netting I tied to every square. This helps hide the netting
on the edges.
One more
note about how many threads to use in each "bunch"
- As I said, I used 3 per bunch. I found that this allows the
thread colors to mingle very well. The more threads you put
in each bunch, the more obviously each bunch of a different
color tends to stand out as a streak of color instead of blending
in. This is not a bad thing if you want the colors to look a
bit "patchy". But if you want a smoother blend, use fewer threads
per bunch. It's simply a matter of choice to get the effect
you're going for.
 |
 |
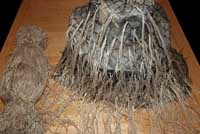
Above:
Tying the base tan
color to the hood, and -
Right: The finished hood |
My "base"
thread was the tan (natural) color, which I applied to the whole
hood. Then I went back and added some of the "gray"
(actually a pastel grayed-green) to some of the empty squares
in the 2-row spaces between base color rows, as in the left
lower photo of thread tying on the pants leg. The base color
alone looked a bit flat at first, but once just a few of these
"gray" thread bunches and a couple of light olive
bunches were applied, the whole appearance of the hood changed.
Suddenly it looked just like I had hoped - the dried coastal
grasses I so often sit among when photographing on the Outer
Banks in Fall and Winter. An approximate ratio was one gray
or light olive to three tan bunches. Between gray and light
olive the ratio is about three gray to one light olive bunch.
Another way to express it is that for each 100 thread bunches,
there would be 75 tan, 18 gray and 7 light olive. This color
mixture suits my purposes, and is a blend between the "mossy"
and "desert" color schemes the commercial Ghillie suit makers
use. One maker offers a similar coloration to mine that they
call "Field Grass". I call mine "winter grass".
You will need to devise your own combinations of colors to suit
the areas where you shoot.
 |
Virtual
test of
"winter grass" color |
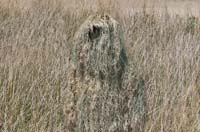
As a "virtual
test" of my "winter grass" colors, I pulled a photo from
my files showing the winter grass on Shackleford Banks, a coastal
barrier island. It's a good example of the environment where
I often photograph birds. I put an overlay of the finished suit
onto the cropped grasses photo and found that it was indeed
nearly a perfect match. The real test will have to wait until
Fall when I go on my coastal photography expeditions.
How much
thread you will use or need is a variable as well. The manufacturer
says it requires 5 bundles for a full suit such as I'm making.
For the hood, the XXL shirt and pair of very full cut 32x40
pants I used, it required 3 whole bundles of tan, plus a bit
each from a bundle of "gray" and a bundle of "light olive",
with a good bit of those two colors left over. The first two
tan bundles covered the hood, pants and 1/3 of the shirt. The
third bundle finished up the shirt. Your tying density, suit
size and number of colors used will dictate how many bundles
you will need. Even if you only use a little bit of a color,
you still have to buy a full bundle to get that color. So in
essence, the total quantity of thread I used came to about 3-1/4
full bundles, a bit less than the manufacturer stated. However,
because I used a little of two colors other than the tan, the
number of full bundles of color I needed for this suit actually
came to five. None of it was wasted though, as I used some to
accent the first green suit, and also had to make the lens covers
and tripod skirts with it.
 |
 |
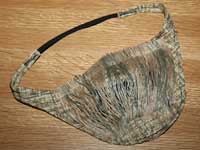 |
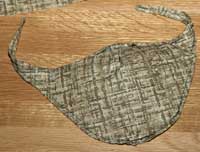
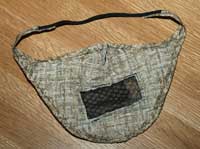
The
"winter grass" color mask - Left:
basic mask form - Center: with elastic
and
vent added - Right: completed mask with
threads sewn over vent.
|
As
a last minute thought, I decided to make a simple little mask
to be used under the hood. I wanted to better hide my face behind
the hood opening using colors matching the hood colors. It's
a cutout of fabric with some threads sewn to it. A 1/4-inch
band of elastic gives it just enough tension to snug it to my
face. A small rectangle scrap of scrim netting and mosquito
netting under the threads below my nose lets my breath filter
out. Otherwise it might drift up around my eyes and fog the
viewfinder in cold weather. I had that problem on the very first
head mask I made awhile back, and used this "vent"
solution to eliminate the fogging problem. I've incorporated
it into any mask I've made since then. I can use this mask alone,
or wear it over a balaclava in cold weather to maintain the
desired coloration showing through the hood opening.
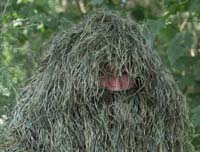 |
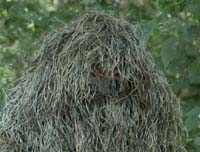 |
Green
hood with no face
mask under the hood.
|
Green
hood using face mask. |
At right
is an example of how well the face mask works under the hood.
The green Ghillie suit without face mask makes it pretty obvious
there is a face behind the green. With the face mask on, there
is quite a difference in what is visible beneath the hood.
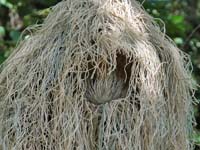 |
The
face mask under the hood.
|
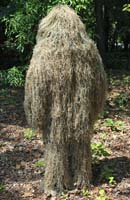
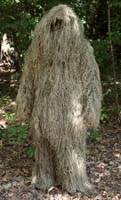
Two sets
of photos of the finished "Winter Grass" color suit are below.
One set was taken in direct sunlight and the other was taken
in shade. I had no "dead grass" scenery to blend into for the
photos, so I'll have to wait for Fall to give it a real test.
I can see I need to do some adjustments to the opening in the
hood. It's far too large at present, but it will be a simple
fix to make it smaller. Without the face mask I made at the
last minute, my face would have been far too visible with such
a large opening. The close-up at left shows how well the mask
covered my face under these circumstances.
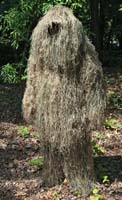 |
 |
 |
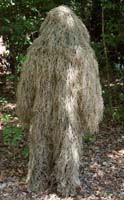 |
"Winter
Grass" Ghillie front and back photos taken in direct sun,
and in shade.
|
The Tripod Skirts and Lens Covers:
Of course,
there is the need for matching camouflage for the lens, camera
and tripod if you really expect to be "camouflaged". For this
I bought some "tannish" fabric as a base for the "winter grass"
color skirt and lens cover. I also found some fabric in dark
greens to use for the green skirt and lens cover base. (I also
used both fabrics for the face masks.)
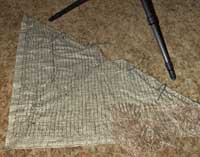 |
The
skirt base with netting
shown laid out flat while
applying threads.
|
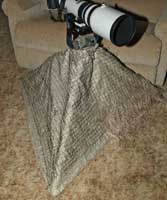
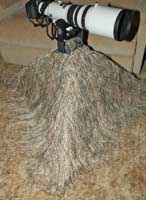
I set my
tripod for the most frequently used position - spread wide and
low for when I'm sitting behind it with my leafy camo (or Ghillie
suit) on. I measured the leg spread and leg length and used
this to cut two triangles of cloth for the base. I hemmed the
edges and sewed the two triangles together. Next I cut the 1-inch
netting to fit and sewed that to the base. I also sewed some
15 to 18-inch lengths of nylon cord to the material to tie the
skirt to the tripod legs. Then it was just a matter of attaching
the synthetic threads. The progress of the tripod skirt construction
is shown by the photos below right.
 |
 |
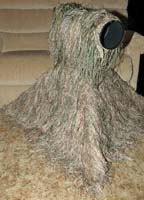 |
Left:
skirt base on tripod Center:
completed skirt, and
Right: skirt with lens cover.
|
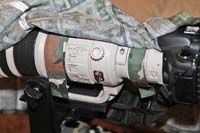
For the
lens cover I simply cut a rectangle of the tan material for
a base. I made cloth
straps to velcro the cover to the lens body. Then I put
3/4-inch wide elastic in the front to hold the cover on the
lens hood, and a 1/4-inch wide piece of elastic to hold the
back of the cover to the camera body viewfinder head. I used
the very same methods for this as when making the lens cover
in my "leafy camo"
lens cover article. Refer to that article for the details
of the straps and elastic. Next I cut and sewed a piece of 1-inch
netting to the rectangle of base material and added the synthetic
threads to finish it off. I cut the 20-inch threads into thirds
and tied these short threads on the front-most three inches
of the hood cover. This avoids having long threads dangling
or being blown in front of the lens. The far right photo above
shows the lens cover in conjunction with the tripod skirt.
 |
 |
Straps
on the green lens
cover. Also visible is the
viewfinder elastic strap.
|
Straps
on the "winter grass"
lens cover with viewfinder
elastic strap.
|
At left
are a couple of photos showing the straps on both lens covers.
As you can see, none of them match. These are always covered
so it really doesn't matter about appearance. I used whatever
scraps of material I had on hand to make these. You can also
see the 1/4-inch black elastic that holds the rear of the covers
onto the camera viewfinder head so the wind doesn't blow it
about.
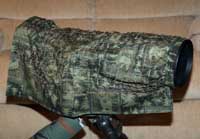 |
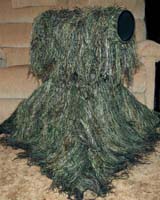
Above:
Green lens cover with tripod skirt.
Left: The green lens cover before & after threads
were added. |
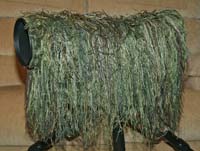 |
The green
lens cover is depicted at right both before and after the threads
were added. The far right photo of the finished green tripod
skirt along with the lens cover gives you more of the effect.
The real test of it all is when the suit is combined with the
tripod skirt and lens cover to see the complete effect (below
left). To prove the whole point of having the combined items,
the final set of images shows me without the Ghillie pants -
just my jeans - and not wearing gloves, and no face mask under
the hood. My hands and face are quite visible. However, when
I huddle down behind the tripod skirt and lens cover on my handy
Walkstool, you can't see my face or hands, or legs and feet
either, and that big white lens is not sticking out like a sore
thumb. The critter's view is of one a continuous non-human and
non-descript shape that looks quite natural. Hopefully, these
suits and covers will get me up close and personal with a lot
of critters, and especially birds, my favorite subject.
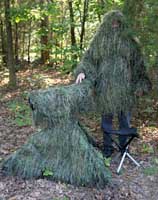 |
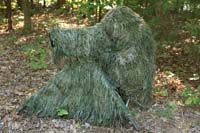
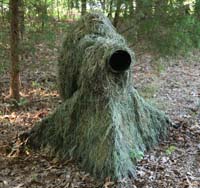 |
Even
without the Ghillie
pants, or gloves, or face mask under the hood,
once I sit down behind the
tripod I'm well camouflaged from any angle. |
In Conclusion.....
Now that
both suits, hoods, tripod skirts and camera covers are finished
I can give you fair warning from experience......this is a LOT
OF WORK. It is hours and hours and hours of work. I had no idea
it would be such a long and tedious affair. I got smarter and
more efficient at fitting and sewing the netting, and tying
on the threads as I went through this, which are the two jobs
that are the most time consuming. It didn't help that the sewing
machine began acting up when I got to the tripod skirts and
lens covers, and I only resolved that problem just as I was
finishing up all the sewing. Of course, I always have to take
on more than I really should..... making two suits, and tripod
skirts, and lens covers, instead of just one. While I am extremely
pleased with how well everything turned out, I can tell you
that I won't be making any more Ghillie suits for a LONG time.
It requires tremendous patience and will power to keep plugging
along. Don't tackle making your own Ghillie suit unless you
have the will power and patience to stick with it. Don't try
making TWO of them unless you have a double helping of will
and patience. It would tax most anyone's resolve.
Sewn Vs. Tied:
With two
of these things under my belt, and knowing how well they CAN
be made, I'll offer one more piece of advice. Based on the quality
of the half dozen or so commercial sewn-threads suits I've seen
in the retail setting, you don't want to buy a pre-made Ghillie
with the threads SEWN on instead of tied. The quality was a
complete joke compared to what I was able to make on my very
first try. You couldn't GIVE me one of those crappy sewn Ghillie
suits. That's not to say well-made suits with the threads sewn
on are not available, because they are. You can buy a
well-made sewn threads Ghillie for the same price or less than
the crap I've seen in stores. You just have to be wise and careful
in your selection, and do some serious comparisons before buying.
One issue to consider with sewn suits is the lack of ability
to add or change thread colors to fine tune it to your needs.
With net tied suits this is easily done. A Ghillie with tied
threads will cost more, but you get better quality and the option
to modify it to your specific needs.
Next - Then I made a two-sided
Ghillie blanket that matches both suits.
|
|
 |
|
 |
